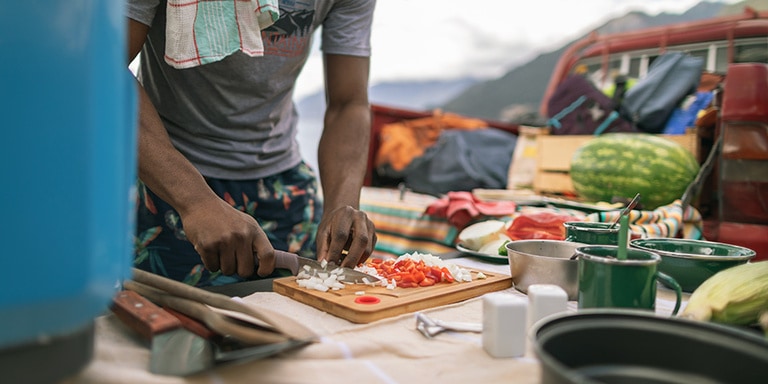
What comes to mind when you hear the phrase "camp cooking?" For many, it's something like pouring boiling water into a store-bought pouch of freeze-dried food or cranking open a can of beans while skewering a few hot dogs over the fire.
Neither is bad, of course, but putting a little effort in to level up your camp kitchen game can pay off deliciously.
"I think a lot of people are scared of camp cooking," says Claude Matkin, a sales lead and outdoor instructor at REI's Asheville store. Drawing from an extensive background in the restaurant industry, Matkin teaches a variety of classes at the store, covering topics like foraging, camp coffee and gourmet cooking. "It's no different than at home—you can either get a frozen pizza or you can try to make your own dough," he says. "What you invest in it is what you're going to get out of it."
Want to make the most of your camping experience by treating mealtime as a highlight rather than a chore? Here are our tips for creating a top-notch camp kitchen, including what gear to stock, how to prep before a trip, how to set up at camp and tips to step up your outdoor cooking game.
Gather Your Gear
While you can craft a rustic setup with nothing more than a tin can and a campfire, a fully stocked camp kitchen will offer infinite options come mealtime.
Camp Kitchen Essentials
Build your kit from the ground up with a solid set of core pieces—but that doesn't necessarily mean buying everything brand new. It's likely you already have some of these items sitting around that can be repurposed for your camp box, or you can look for used options.
- Tableware: Disposable plates, cups and cutlery might be a quick fix, but the low cost of single-use items comes with a hefty environmental price tag. Invest instead in reusable dishes and utensils you can also bring along for picnics, beach days, parties and even at home, when you're not quite ready to tackle that pile of dishes stacked in the sink. One option is a mess kit that includes multiple essential items like a cup, bowl, plate and cutlery.
- Cookware: Far from the easy-to-dent aluminum pots and pans of yore, today's outdoor cookware is built to last, made with heat distribution technology and dishwasher-friendly materials. While you can spring for a complete set, any basic setup should at least include a large skillet and sizeable pot (large enough to boil at least six cups of water) with a lid. If you enjoy cooking over an open flame, opt instead for a cast iron Dutch oven, which has a greater capacity and depth that makes it even more versatile than the classic frying pan. And don't forget a pot holder to protect your paws!
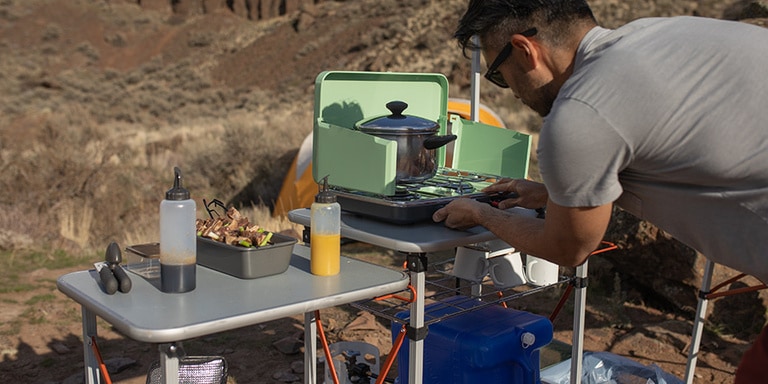
- Stove: Even if the allure of campfire cooking is strong, adding a stove to the mix brings versatility and convenience to your kitchen setup. While one-burner options work well for small-scale meal prep and backpacking, if you're mostly car camping, a two-burner stove will allow you to multitask (especially important for group meals). A windscreen will help improve fuel efficiency and reduce cooking time. Many modern stoves have an ignition button, but Matkin recommends carrying matches or a lighter to ensure you're not left in the cold if the button fails. (To learn more about our staff's favorite camp stoves, read Staff Picks: Best Camp Stoves).
- Utensils: Consider what you use most at home; chances are, you'll want many of the same things when cooking out in nature. A good chopping knife (and cutting board) is clutch, but you might also include a whisk, peeler, stirring spoon, spatula, tongs, corkscrew, can opener, measuring spoons and a measuring cup.
- Cleanup: "I tell everybody that you want to have everything including the kitchen sink," says Matkin. He means this quite literally—a camp "sink" can be anything from a plastic tub to a large bucket to an actual portable sink (opt for a collapsible one to save space). These are handy for not just soaking and washing dishes, but also gathering water and toting your supplies. Speaking of which, we suggest bringing basics like biodegradable soap, a dish scraper, sponge, dish towels, cheesecloth or pantyhose to filter out scraps and pack out, reusable napkins and bags for garbage and recycling.
Bonus Items
Beyond the basics, consider what else will elevate your cooking—and dining—experience.
- Coffee & tea maker: While instant coffee has come a long way, so have camp coffee makers, which are essentially just lighter, more compact versions of the ones you use to brew at home.
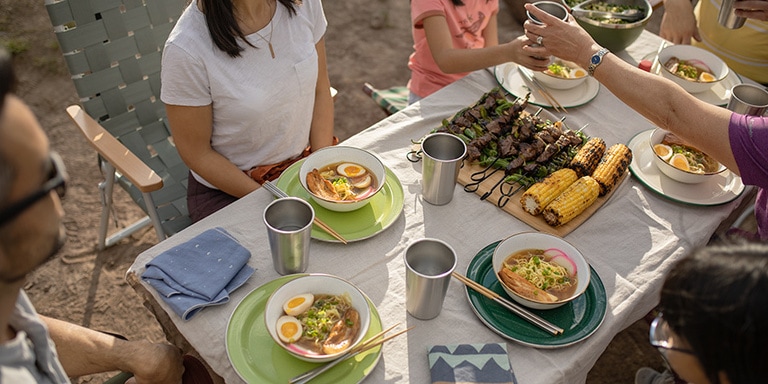
- Accessories: A tablecloth with clips to keep it secure, fairy lights, solar lanterns and sit pads can turn an average, grubby picnic table into a 5 million-star restaurant.
- Extra prep space: "If we're gonna go from a camp cook to a camp chef, then I'm going to start thinking about my prep table," says Matkin. He recommends a portable table with a large, stable surface for your stove, ingredients and cookware.
Organizing Your Kitchen Gear at Home
You know that saying, "An ounce of prevention is worth a pound of cure"? Well, an ounce of preparation is worth, um, a pound of roasted marshmallows. "Do the majority of the work at home so when you do get out there, you can spend most of your time hiking and enjoying the area and the activities that you're there for," says Matkin. "Even in the great outdoors, you don't want to spend the whole time in the kitchen."
Here are some ways to minimize your at-camp to-do list:
- Create a camp kitchen checklist and consult it before packing.
- Create a portable gear organization system using storage bins, crates or totes labeled with the items they contain.
- Write down, print out or snap photos of ingredient lists and recipe directions, labeling each with the date and meal (for instance, "Saturday Breakfast").
- Pre-chop meats and vegetables, and store ingredients in reusable food storage containers labeled with the contents. Matkin loves resealable silicone bags like Stasher's, which come in a variety of sizes.
- Similarly, premix and label dry ingredients instead of toting bulky boxes and bags.
Setting Up Your Kitchen at Camp
Let someone else set up the tents and get the campfire going—it's time to cook!
Get Organized
- Set up a wash station with running water (a jug with a spigot works wonders; use a bungee cord to lash it to the picnic table), biodegradable soap and a hand towel.
- Create an area with separate containers for garbage, compost and recycling.
- Consult your recipe and lay out all ingredients, cookware and utensils needed before you begin.
- If you're handy and want to really impress your fellow campers, consider building a camp kitchen chuck box that will serve as an all-in-one kitchen on the go.
Clean Up
While it's best to tidy up as you go (it's never fun doing chores, and especially so on a full stomach!), you'll need to wash dishes at some point after your meal. The tried-and-true method utilizes three "sinks," or, more likely, three buckets or bins:
Step 1: Soak, then clean dishes in a container filled with hot water and biodegradable soap.
Step 2: Rinse dishes in a container filled with hot water.
Step 3: Do a final rinse in a container filled with cool water.
Step 4: Towel-dry or air-dry dishes.
Leave No Trace
Dirty dishwater disposal is where things get tricky: While it's tempting to just dump it all onto the ground, this isn't a great practice. Food scraps left in the water can attract animals, who will then claw at the ground in hunt of a tasty meal, potentially destroying grass and other foliage in the process, and possibly become habituated to human food. Instead, Matkin uses a piece of cheesecloth or pantyhose to filter out scraps, which he packs out or throws in the garbage. To dispose of the remaining gray water, he recommends dispersing it as widely as possible, so that it doesn't puddle up in a single spot. (Many established campgrounds may also have designated areas for washing dishes).
Store Wisely
Speaking of animal attractants, it's important to research food storage regulations wherever you'll be camping and store your food thoughtfully so critters aren't tempted to break into your leftovers (or bother you while you're cooking). Matkin loves hard-sided coolers such as those by or YETI or RovR Products, which are not only certified bear-resistant, but also come with dividers and other accessories that help you stay organized.
Get Creative
The focus here is on setting up a great camp kitchen, but what good is a well-stocked, perfectly organized grub hub if you're not actually using it to whip up tasty meals?
Seek Inspiration
"I always want people to try different foods," says Matkin. "But I always tell them to make sure they're not trying something for the first time in the woods." Carve out some time before your next trip to test a few recipes at home. Thumb through a couple of outdoor cookbooks, visit websites like Dirty Gourmet and Fresh Off the Grid or start right here with REI's collection of drool-worthy, camp-friendly recipes, including creative dishes like spinach goat cheese frittata and seafood risotto that go way beyond typical tent-side fare.
Ramp Up Your Flavor
"Spice is life," says Matkin. While he's partial to anything that adds heat to a dish (especially when the weather's cold), shaking a few homemade or store-bought spice blends into portable containers or mixing up a couple sauces and marinades in squeeze bottles can elevate even the most basic camp food. One of Matkin's favorite things to cart along on a trip is a container of coconut water, which adds a slight tropical sweetness—plus electrolytes and energy-boosting sugars—to anything from breakfast granola to Thai curry.
Indulge Your Sweet Tooth
Sure, planning out three square meals is important, but let's not forget dessert! S'mores are a classic, and for the ultimate upgrade Matkin recommends grabbing a pair of camp roasting forks, like ones from Rolla Roaster that rotate for even heat distribution on your 'mallows. But why not go a step above and try out one of Matkin's favorite desserts from his Boy Scout days: campfire apple crisp. Create a small packet out of a piece of foil and fill itwith a mixture of chopped apple, granola, cinnamon and butter, then chuck the whole thing in the fire for 15 to 20 minutes. "It's toasty and warm and it's actually got real fruit in it, so it's not going to be full of sugar," says Matkin. "It's still one of my favorite things to this day."